How to Uninstall AVG Completely
Depending on the AVG product (or bundle) you have
installed, you will need to remove different components.
Make sure you follow the
steps accurately
The most important point I need to make is that you have to
remove all the components of AVG antivirus before you uninstall the main
application.
Let's begin:
1.
Open the start menu and choose Settings > System > Apps
& features.
There, locate all the AVG
apps, and choose one which is not named
just AVG.
You need to remove all the other products before you remove the
main AVG installation.
In my example below I
have AVG and AVG Protection installed.
I began by choosing AVG
Protection and clicking Uninstall:

2.
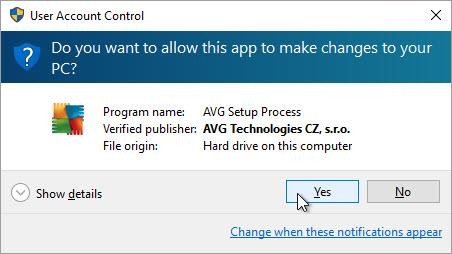
At this point you get the user account control prompt where you
confirm that you want to run the AVG setup and uninstall the software.
Click Yes:
Click
Yes when prompted
3.
On the next screen you need to choose Uninstall:

Click
Uninstall to remove AVG completely
4.
And after that you must confirm that it's not a mistake and you
really want to uninstall AVG.
Click Yes,
Uninstall:

Confirm
you want to uninstall AVG
5.
Now the process of removing AVG from your computer will begin.
Wait until it's finished, it will take a few minutes:

AVG is
being removed from your system
6.
Here you can choose to leave feedback, which will open in a new
browser window or you can simply skip this step.
7.
Regardless of the option you choose in the previous step, you
will reach this screen and will be prompted to restart your computer.
Click Restart
Now:

Restart
your computer to complete this phase
8.
Now, once your computer boots up, you will need to repeat the
process for all the AVG software you have installed until only the main AVG application remains.
When this is the case,
choose it and click Uninstall:

Locate
the main AVG app
9.
So once again, there's a prompt by Windows and you click Yes:

Confirmation
prompt - click Yes
1.
Choose Uninstall:

Choose
to uninstall AVG completely
1.
Confirm by clicking Yes, Uninstall:

Confirm
your choice again
1.
Wait until the process is complete:

AVG
removal in progress
1.
Click Finish:
You don't even have to restart after removing the main AVG app.

Uninstall
complete - no reboot required
1.
Now, this next bit is important if you don't want to have AVG's
scattered remains all over your computer:
Open the start menu
again, and go to Settings > System > Apps & features.
Type in "avg"
in the search bar, and you might find what I found - installation/s
of Visual Studio 2012 redistributables (or another year)
by AVG technologies.
The reason for this, is that AVG needs visual studio, and if you
don't have a Microsoft Visual Studio software installed on your system, AVG
will install its own because it can't run without it.
Sadly, the uninstaller doesn't remove this and it stays on your
computer.
You can keep it, but it's just clutter after you've removed AVG
so best remove it.
Simply choose
the first Visual Studio app, click Uninstall and let the small
window that opens up finish and close.
The first one won't
disappear yet, but do the same for the second app nonetheless.
Close the system window, and
open it again, and both of these installations should be gone.
restart
your computer one last time before you install another antivirus.

Traces
of AVG in the form of Visual Studio apps
If you're following all the steps outlined above but you're
still having issues with uninstalling AVG, I would recommend. To take technical help of our technical team by just dialing toll free number 1888 479 2017
You can expect Avg technical support services for all Avg Antivirus products including Avg Protection, Avg Internet Security, Avg Ultimate, Avg PC Tuneup, Avg Mobile Security and all other personal and professional editions of Avg Antivirus software. Through Avg antivirus technical support you can protect your PC with all kinds of dreadful virus.
Call 24/7 Support Toll-free: 1 888 479 2017
log on to our web site : https://www.icognix.net/technical-support-for-avg-antivirus/